Frequently Asked Question
[Managing Repricing] How to use Group?
Last Updated 7 years ago
Use bulk actions to organize your listings into sub-groups.
Add to Group
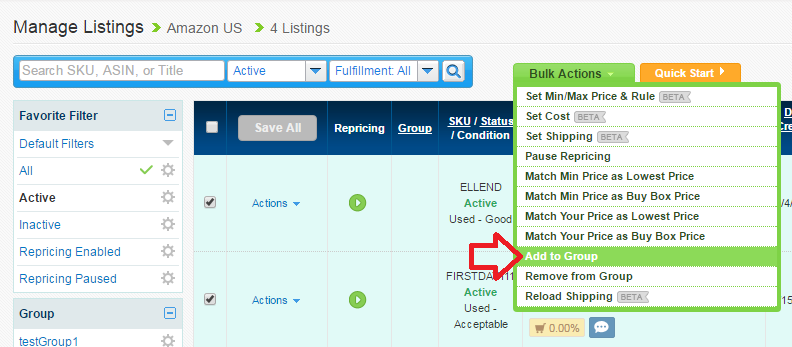
1. Select the listings you want to group.
2. Click Bulk Actions > Add Group
3. Select the Group you want to add in and Save.
Create Group
You can view the Group on the left side of the Manage Listings page.
Group Actions
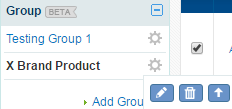
The gear icon next to the groups allow users to perform certain actions to the group:
Adding the optional column for 'Group'
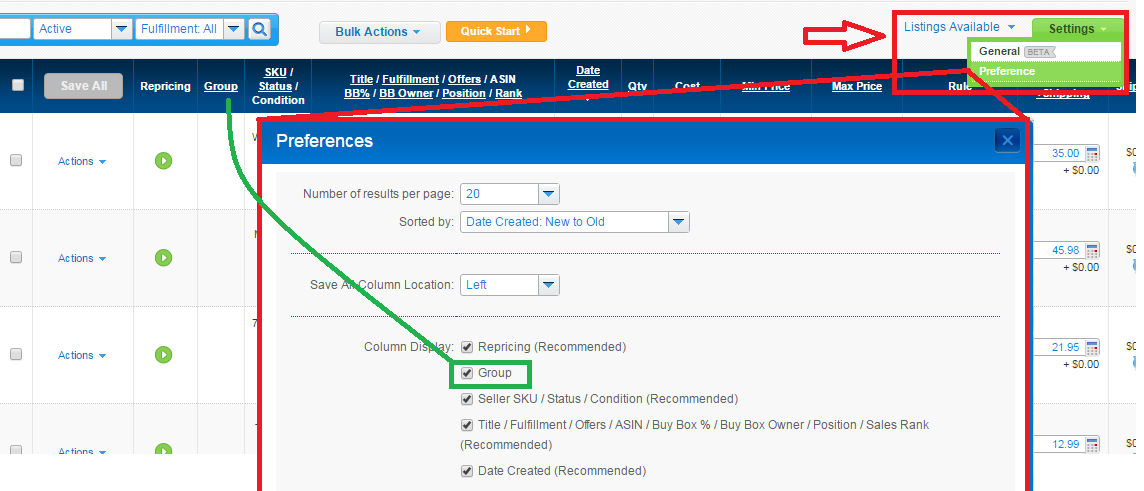
The group column is hidden by default. You can add the group column by going to Settings > Preference (upper right-hand corner). The new update will only allow each listing to be assigned to one unique group. In other words, the same listing cannot be assigned to two different groups.
Note: the upload file will have the Group column
You can refer to Managing Listing Page Update for more detail.
Add to Group
1. Select the listings you want to group.
2. Click Bulk Actions > Add Group
3. Select the Group you want to add in and Save.
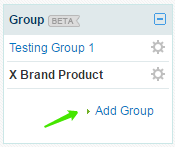
Create Group
You can view the Group on the left side of the Manage Listings page.
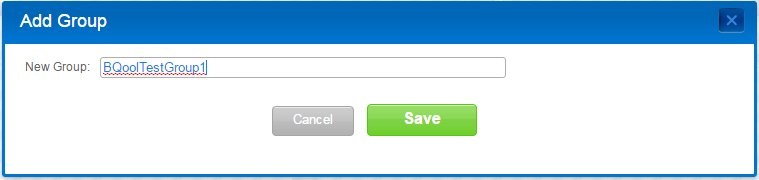
- In the Group, click Add Group
to create a new group. - Enter a group name and Save as a new group.
Group Actions
The gear icon next to the groups allow users to perform certain actions to the group:
- Edit: Rename the group
- Delete: Delete the group
- Move up/down: reorders the groups
Adding the optional column for 'Group'
The group column is hidden by default. You can add the group column by going to Settings > Preference (upper right-hand corner). The new update will only allow each listing to be assigned to one unique group. In other words, the same listing cannot be assigned to two different groups.
Note: the upload file will have the Group column
You can refer to Managing Listing Page Update for more detail.